
How to Make Your Own Yarny Guide
Learn how Yarny was created and follow along to make your own magical friend.
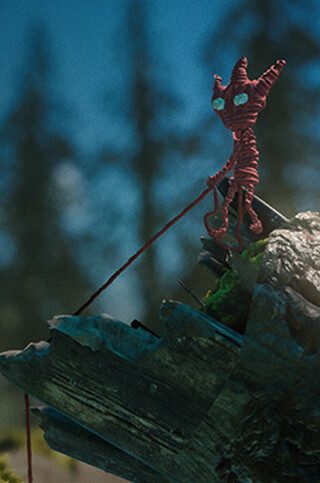
In Unravel™ Two, you can create a Yarny of your very own. Complete tough challenges to reveal new heads, bodies, and colors of yarn, and use them to customize your little magical character. Then follow the guide below – written by Unravel™ Two director and Yarny fashioner Martin Sahlin – to learn how to bring your Yarny out of the game and into real life. Don't forget to send us a picture at @unravel_game!
One of the most fun things about revealing Unravel™ to the world was the love you’ve shown for Yarny. From the kind words to the awesome fan art, you’ve all made us feel wonderful. We never saw it coming, but it totally blew us away.
We’ve been asked about Yarny dolls quite a bit, and I’ve promised I’d put together a guide to show you how I made the original Yarny. Here it is! It’s a bit lengthy, but I wanted to make sure I gave as much detail as possible so you could create your own. We hope you continue sending us the Yarnys you make on Twitter at @Unravel_Game, too.
Get Tools and Supplies
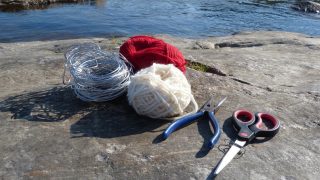
Before you do anything, you’re going to need to get the tools and supplies needed to create a Yarny. Here’s what you’ll need:
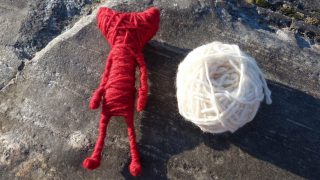
- Yarn, of course. The bigger and fluffier the better.
- White yarn for the eyes.
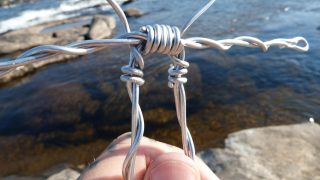
- Wire for the skeleton. The original Yarny’s skeleton was made from wire that I peeled off a rusty anchor cable on a boat. It was pretty difficult to work with (and pretty hard to pose), so I made a second Yarny later from better wire. The stuff you want is called armature wire. It’s made for model making, it’s so bendy that you barely need tools to shape it, and you can bend it a thousand times without breaking it. You could order it online, or get it from an art supply store.
- Pliers aren’t super necessary if you’ve got good armature wire, but they can be nice to have around.
- Scissors can be good too.
- A paper clip is pretty much perfect for sewing up loose yarn ends. I used a piece of wire on the original Yarny, so I guess that works too.
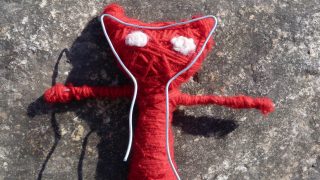
Get a Good Reference
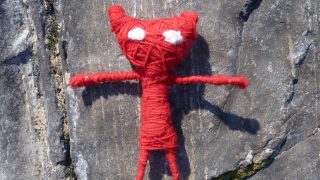
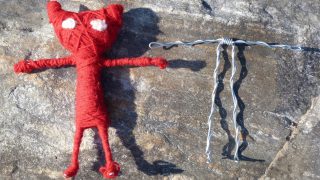
It’s nice to have some sort of reference. I used my original Yarny as a template, but you could sketch something up, or print this out. The original Yarny is just under 22 cm tall (or just over 8-1/2 inches).
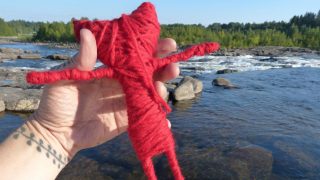
Find a Location

Now that you have all the tools you need, you’ll have to find a place to work. You know what works best for you, but for me, nature is the thing. I was out in the woods when I made the first Yarny, so I figured I’d stick with that tradition for this guide. I just followed the river that runs by the Coldwood office until I found a nice, flat surface (in this case, a rock).
Now, you’re ready to build!
Step 1: Start the Wire Skeleton
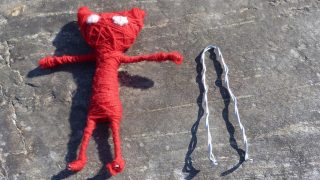
The first part you build is a poseable wire skeleton. There are probably tons of ways you could do this, but the way I did it was to do the legs/body, the arms and the head in three separate parts. Start with the legs/body. Cut a piece of armature wire long enough to reach from foot to foot and back again, and bend it to shape. Make little loops for the feet. Twist the wire to make the skeleton stronger, that’s why it has to be double length. If you’ve got good armature wire, it’s pretty easy to twist even without pliers.
Step 2: Make the Arms
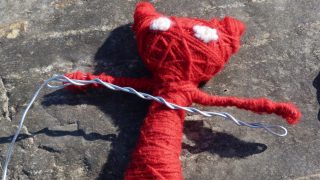
You make the arms in the same way as the first skeleton piece. Measure up a double length of wire, make little loops for the hands, and twist the wire to make it stronger. To attach the arms to the body, just wrap them in some more wire. It’s easier to wrap the wire if you make it pretty long. You can cut off the loose ends afterwards.
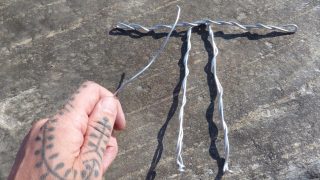
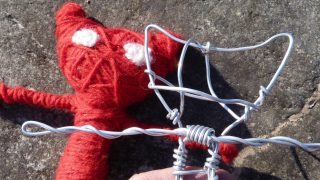
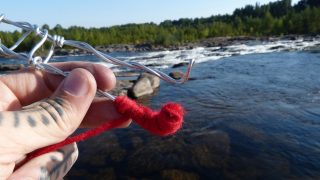
Step 3: Build the Head
To make the head, measure up some more wire. Try to make the shape roughly match the silhouette you want to end up with, but don’t make it too huge. It will get bigger once you start wrapping it in yarn. It’s okay to exaggerate the tips of the ears a bit, and make them slightly longer – they have a tendency to disappear otherwise. Make the ends of the head wire pretty long, and then wrap them around the body wire to attach the head.
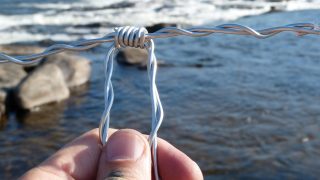
Step 4: Stabilize the Body

Take another piece of wire and use it to stabilize the body; your Yarny will be too squishy otherwise. You can actually wrap a bit more wire around the hips than what I did here, because it makes the legs a bit easier to pose.
Step 5: Stabilize the Head
Repeat that stabilizing process for the head. Use the stabilizing wire to give the head a bit of shape too, that makes the wrapping process easier.
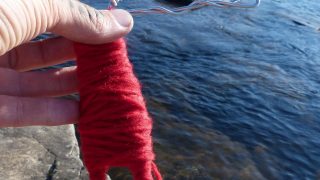
Step 6: Wrap the Legs in Yarn

The skeleton is done, time to start wrapping it all in yarn! Start at the feet and just wrap. To attach the yarn, just hold it in place, then wrap a couple of loops of yarn around it. The toes of the wire skeleton are a bit difficult to wrap, but there’s a nice way to do it. Just bunch some of the yarn up so it covers the wire, hold it there, then wrap yarn around it to hold it in place. If you get it wrong, just unwrap the yarn and try again. Give the legs some shape by wrapping more yarn around the thighs and the feet, while keeping the knees pretty skinny.
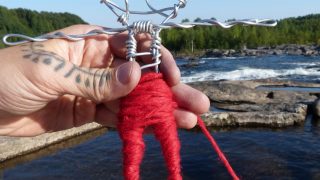
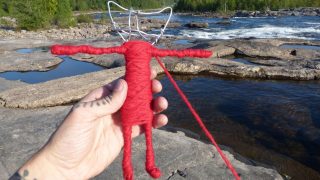
Step 7: Wrap the Body
With the legs done, it’s time to start wrapping the body. Give the body some shape. Make the “shirt” a little longer than the actual hips of the wire skeleton – it looks nicer that way – but wrap the yarn pretty loosely, so you can still pose the legs. Don’t wrap too neatly, it’s nicer when the yarn crisscrosses a bit. If the shape is too bulky somewhere, you can always unwrap and try again, or you could wrap some yarn really hard around that area to tighten it up.
Step 8: Wrap the Arms
Moving on to the arms. The same thing goes here – give them some shape by wrapping more yarn around shoulders and hands, and keep the elbows pretty skinny. Wrap them thin, but thick enough to hide the shape of the wire underneath. Just like the toes, the hands are a bit tricky to wrap, but you can use the same trick here to cover the wire.
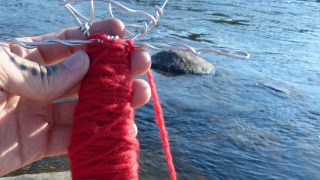
Step 9: Wrap the Head
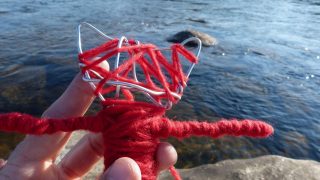
The head can be the trickiest thing to wrap. Or maybe not, if you were more generous with the wire when you made the skeleton. When I made this Yarny, the hand unraveled a bit at this stage, but I just wrapped my way down to the arm, put the yarn back where I wanted it, wrapped it in place, and wrapped my way back up to the head to finish.
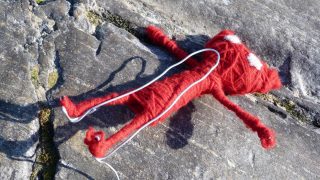
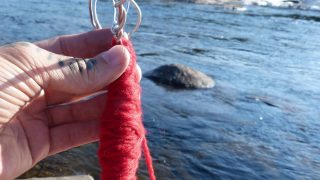
Step 10: Tie Up Loose Ends
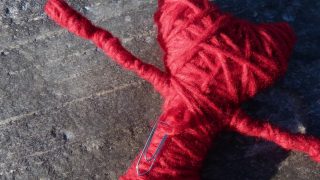
When you’re happy with the shape of your Yarny, use the paper clip as a needle to sew up the loose yarn end. It doesn’t have to be attached super firmly, just hidden away.
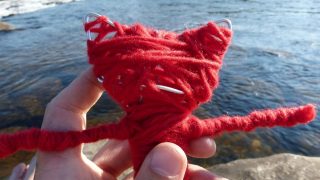
Step 11: Make the Eyes
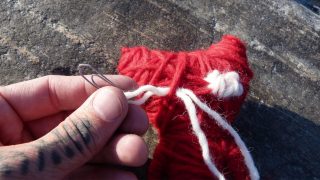
Almost done! All that remains is the eyes. To do them, use the paper clip again, and sew them in place. You can be pretty chaotic, the eyes look less stitched that way. You want the eye to be a nice almond(ish) shape. When you’re done with the eyes, tuck the loose end of the yarn away just like you did before.
Step 12: Go on an Adventure!

There you go, you have your own Yarny, ready to go exploring. Be sure to send us pictures on Twitter, we do love seeing your creations. Also, if you add your Location to the Tweet (learn more here), we can see where Yarny is all over the world!

Martin Sahlin
@monkeybeach
