How to Manage Power Distribution

Managing your starfighter’s power distribution between weapons, shields, and engines is a central concept in Star Wars™: Squadrons as you adapt to the ever-changing battlefields.
What is Power Distribution?
Depending on the starfighter, you will have two or three power systems: Engine Power, Primary Weapon Power, and on certain ships, Shield Power. There is a fixed amount of power available to your starfighter that is distributed across these systems. By default, the power is divided evenly between the systems. But you may divert power as needed to any system in order to give that system an advantage.
For example, if you require extra speed, you can draw power from the primary weapons and shields and transfer it to the engines, effectively increasing your top speed. Similarly, you can draw power from engines and shields to charge the primary weapons faster, or draw from engines and primary weapons to recharge your shields more quickly. Bear in mind that although adding power to a system increases that system’s advantage, the other systems’ performance will be reduced.
Additionally, if you entirely fill the power meter of any system, that system will begin to overcharge. An overcharged system will unlock a unique advantage from that system: overcharged engines will start to fill a boost meter that you can draw from to travel at extremely high speeds for a short period, which in turn provides the opportunity to drift; overcharged primary weapons will dramatically increase their destructive force; and overcharged shields will generate an additional layer of shields to protect your ship.
How Do I Manage Power Distribution?
Power distribution is fairly straightforward: the D-pad / keys 1-4 / POV thumbstick is used to direct power to a particular system (the power transferred will be drained in equal portions from the other systems). D-pad left / 1 / POV west will transfer power to the engines, D-pad up / 2 / POV north will transfer power to the primary weapon, D-pad right / 3 / POV east will transfer power to shields (if the ship is equipped with shields), and D-pad down / 4 / POV south will instantly rebalance the power levels.
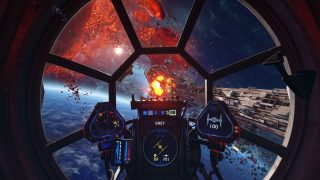
You will notice that the systems are color-coded: blue power meter and blue throttle gauge for engines, red power meter and red charge bar for lasers, and green power meter and green shield status for shields.They are also laid out in an intuitive way so that your controller and the dashboard in front of you correspond. Engines are represented on the left of the power management display, the throttle gauge is on the left side of the cockpit, and you divert power to the engines by pressing D-pad left / 1 / POV west. Primary weapons lay in the center of the power management display, and the laser charge meter is centered at the top of the dashboard, and you divert power to the primary weapons by pressing D-pad up / 2 / POV north. Shields are represented in the right column of the power management display, at the right side of the dashboard, and you divert power to the shields by pressing D-pad right / 3 / POV east.
Note that since all starfighters generate the same amount of power, the starfighters that are not equipped with shields will always have a little more power per system, since that power is spread across only two systems instead of three.
How to Use the Emergency Power Converter
Since starfighters without shields do not have to manage shield direction (focus shields), these ships are provided with an additional ability: Emergency Power Converter. Holding X (Xbox One) / Square (PS4) / C / JOY 7 and using the left thumbstick / mouse wheel / POV to navigate the pop-up menu, you can instantly shunt all power from one system to the other, giving you the advantage of overcharged engines or overcharged primary weapons at a moment’s notice, at the expense of the other system.
This will not change your power distribution settings, so if that system is not currently overcharged, the additional power will start to drain. Bear in mind that – depending on the power levels before using this ability – converting power to engines may leave you without primary weapons for several seconds, and converting to primary weapons will severely impact your speed for a short time. That said, this ability can provide a quick tactical advantage to make a quick getaway or to deal heavy damage in a pinch.


