Need for Speed: Heat
for PS4
Text Manual
NFS Heat PS4 Text Manual
Contents
GETTING STARTED
Play Station 4 System
Starting a Game: Before use, carefully read the instructions supplied with the PlayStation 4 computer entertainment system. The documentation contains information on setting up and using your system as well as important safety information.
Touch the (power) button of the PlayStation 4 system to turn the system on. The power indicator blinks blue, and then turns white. Insert the Need for Speed Head sic with the label facing up into the disc slot. The game appears in the content area of the home screen. Select the software title in the PlayStation 4 system home screen, and then press the cross button. Refer to this manual for information on using the software.
Quitting a game: Press and hold the PlayStation button, and then select [Close Application] on the screen that is displayed.
Returning to the home screen a game: To return to the home screen without a quitting a game, press the PlayStation button. To resume playing the game, select it from the content area.
Removing a disc: Touch the eject button after quitting the game.
Trophies: Earn, compare and share trophies that you earn by making specific in-game accomplishments. Trophies access requires a Sony Entertainment Network account.
CAN YOU TAKE THE HEAT?
Palm City, a racer’s paradise, attracting the best drivers to race in high-speed competitions for a chance to join the exclusive League. Out to destroy this racing haven is a rogue police task force, taking down anyone who gets in their way. Hustle by day, earn your reputation by night, and maybe you can rule the streets in Need for Speed Heat.
CONTROLS
There are two ways to drive: Auto and Manual. Below are the controls for each mode based on their default presets.
Auto Gear Box Control
Nitrous: Cross button
Handbrake: Square button
Change camera view: Triangle button
Action: R1 button
Brake: L2 button
Accelerate: R2 button
Photo mode: R3 button (hold)
Phone app: dpad right button
Campaign objectives: dpad left button
Skip Track: dpad down button
Menu: OPTIONS button
Map: touch pad button
Steering: left stick
Rotate camera: right stick
Change car (at event): L1 button
Horn: L3 button
Take snapshot: R3 button
Manual Gearbox Control
Nitrous: Cross button
Gear down: L1 button
Handbrake: Square button
Gear up: R1 button
Action: R1 button
Brake: L2 button
Accelerate: R2 button
Photo mode: R3 button (hold)
Phone app: dpad right button
Campaign objectives: dpad left button
Skip track: dpad down button
Menu: OPTIONS button
Map: touch pad button
Steering: left stick
Rotate camera: right stick
Change car (at event): L1 button
Horn: L3 button
Take snapshot: R3 button
Difficulty
Choose between three difficulty settings: Easy, Medium, and Hard. Lower difficulties make opponents easier and reduce score targets in races and trials. Feel free to adjust your difficulty setting at any point in the game.
GAME SCREEN
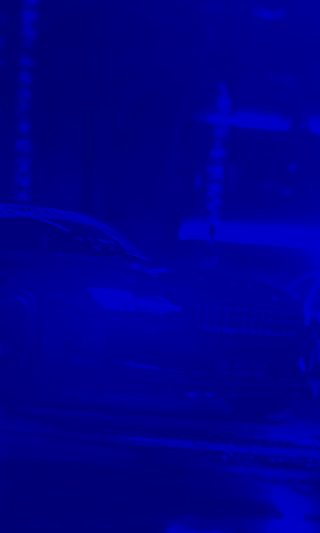
Game Screen Driving
Alt. Text: This picture shows what the screen would like to a player while driving.
Health
Hitting cars, smashing into obstacles, or rolling over damages your car. When your car’s health reaches O, you’re Wrecked, which means a trip to the Garage—but getting Wrecked while being pursued means you’re Busted, costing you Bank and your Heat Multiplier.
Drive through any Gas Station to restore your health to full.
Note: You have unlimited changes to restore your health during the Day, but you can only perform this function three times each Night. If you’re approaching your nightly limit, it might be time to return to the Garage.
GAME MENUS
Main Menu
Press the OPTIONS button to enter the Main Menu.
Play
Return to the game or lobby, adjust your online and general settings, set up a party, or search for players.
Garage
Make quick adjustments to your car with Performance, or fast travel back to your Garage.
Social
Check on your Crew and Crew Trials or look in on your Challenges or Snapshots.
Progression
See your Collectibles and Activities Progression within Palm City’s Districts or explore the Codes for gameplay tips.
STORY
The Speedhunters Showdown is in full force on the streets of Palm City, gathering drivers and car zealots from all over. Taking advantage of this influx of racing talent, an elite club of racers called the League is holding tryouts for those wanting a shot at racing glory. But standing in their way, and yours, is the city’s High-Speed Task Force, a rogue unit who operate by their own rules. Can you make it into the League without getting caught in the Task Force’s snare?
Your Crew
Lucas Rivera
A renowned former street racer, Lucas is determined to stay on the right side of the law. Though he passes up the driver’s seat, he now works as a mechanic for the racers of Palm City, and happily offers his garage as a hangout for those new to the area. Seemingly laid-back, Lucas is fiercely loyal and would do anything to protect his family, including his younger sister, Ana.
Ana Rivera
Reckless and determined, Ana strikes a dramatic contrast to her brother, Lucas. Never happier than when she’s hitting the streets with her crew and beating the competition, she’s a passionate racer who refuses to let anyone stand in the way of her dreams, especially the cops.
Palm City Police
Lt. Frank Mercer
Head of Palm City’s newly formed High-Speed Task Force, Frank Mercer is a charismatic and commanding figure who presents a trustworthy face to the public. But after dark, he encourages the officers under his charge to break the law and exploit the city’s street racing problem for his own gain.
Danny Shaw
Mercer’s loyal lackey, Shaw happily takes bribes from those with the cash, and torments any racers who resist. His desire to gain Mercer’s approval is so strong that he blindly carries out Mercer’s bidding, engaging in illegal actions with no fear of punishment.
Eva Torres
One of the Task Force’s senior officers, Torres is a much-needed cool head in Mercer’s inner circle. Determined to keep their nefarious dealings under wraps. Torres works from the sidelines to lead her force away from exposure, and to ensure her own survival.
DAY/NIGHT
Compete in the Day, make your name at Night. In Need for Speed Heat, the time of day changes your access to different events—and what you risk.
When you exit the Garage, you choose to enter Day or Night. You can switch from Day to Night by pressing the L3 button from Map menu, but you can only change from Night to Day at a Garage.
Day
During the Day, enter Speedhunters Showdown Events to win Bank, or explore Palm City at ease.
Note: While there are cops on patrol in the Day, they’ll leave you alone—unless you give them a reason to target you. You won’t earn any REP or Bank from cop chases during the Day, so it’s better to avoid them.
Bank
Events available during the Day give you Bank, the currency you need to buy new cars, car parts, customization options, and more. But remember, it doesn’t matter how much Bank you have if you don’t have the REP to buy it.
Night
With cops on the prowl, race in illicit events to earn HEAT and increase your REP. Resisting the police increases your HEAT and earns you higher REP—unless you get caught.
To end the Night, you need to safely enter a Garage. Night also ends if you’re Busted.
REP
In Palm City, your reputation is everything. You can have all the Bank in the world, but you can’t buy higher ranked cars or parts, or access certain races, unless you have the required REP level.
You earn HEAT throughout the Night, as well as a HEAT Multiplier. Returning to the Garage to end the Night converts that HEAT to REP points; after earning a set amount, you increase your REP level. Leveling your REP also unlocks new items to buy, racers to compete in, and rewards you with cars, parts, and more.
Heat and Heat Multiplier
Causing mayhem increases your HEAT. When you head back to the Garage, the REP earned during the night combined with your HEAT Multiplier increases your total REP—but with higher HEAT comes more cops on the prowl, as well as more intense police vehicles. While you have HEAT, you cannot Fast Travel. The max HEAT Multiplier you can earn is 5x.
If the HEAT gets too much, then stop by a Garage to safely end your night. This gives you your earned REP (plus the additional REP from your HEAT Multiplier) and resets your HEAT and HEAT Multiplier to zero.
Remember, getting Busted by the cops resets your HEAT Multiplier and takes some of your Bank. Keep this in mind when choosing to increase your HEAT Multiplier, or safely banking your HEAT.
Note: In the Day, you only accrue HEAT while engaged in a cap chase; after the chase ends, your HEAT immediately resets to zero and you earn nothing.
GARAGE
The Garage, a racer’s second home. Head to the Garage for car maintenance, Racer Challenges, or to check on your Crew.
Garages serve as your safe house. If you want to keep your REP and end the Night complexly, stop by any Garage. If your car is Wrecked (meaning it loses all its heath), you’ll be sent to a Garage. If you’re Wrecked by the cops, you’ll be Busted first.
My Ride
While a good racer needs keen driving skills, they’re nothing without a well-maintained car. Every car has a Performance Rating determined by the base model and its parts; increase your Performance Rating to open new races and rival more difficult opponents.
Handling Profile
Each car has its specialty. Refer to your car’s Handling Compass to see where in the four possible categories it falls: Race, Road, Offroad, and Drift. You can modify the compass further by installing new Tires, Suspensions, or Differentials. Keep your car’s Handling Profile in mind when choosing a car for an Event—you don’t want to take a Drift car out for a Race event.
Performance
A car is only as good as the parts that make it. Buy and modify your car’s parts to increase its Performance Rating or modify its Handling Profile. Every part falls into one of four categories: Engine, Chassis, Drivetrain, and Auxiliary. You can also swap out your engine for a higher model by pressing the Triangle button.
Parts are rated by quality (Stock, Sport, Pro, Super, Elite, and Ultimate). As you raise your REP, you’ll unlock higher quality parts—at the cost of more Bank.
Additional parts are unlocked from story missions, completing Collections, and more. Check your Inventory to see what you already have before buying more parts.
Note: You can make quick Performance adjustments on the fly through the Garage section of the Main Menu. You won’t be able to buy new parts, but you can work with the parts you already have.
Customization
Performance is important, but if you want to impress other racers, take the time to give your car some style. In the Body menu, you can replace body parts, tint your windows, color your rims, and more. In Paint & Wrap, give your car a new coat of paint or add some decals. In Effects, you can customize your nitrous color, tire smoke, underglow, air suspension, and horn. You can also adjust your Stance and Exhaust Sound.
If you like what you’ve made, upload your completed car designs for others to download in Paint & Wrap.
Note: Body car parts and Effects cost you Bank, but Paint & Wrap, Stance, and Exhaust Sound can be adjusted for free. Some sections in the Body menu (such as window tinting and rim coloring) are also free. No matter how little Bank you have, you can always afford to give your call some flair.
Character
Your cars may be your pride and joy, but don’t neglect yourself. In the Character menu, you can Customize your hair, outfit, shoes, etc., or use your excess bank to purchase more options. Hair color can be changed by pressing the Triangle button.
Want a new character? Use Pick Character to choose from a variety of racers at any point in the game.
Showcase
Nothing makes better decoration in a Garage than some beautiful cars. Use the Square button to display your own cars, or the cars of your Crew. Up to seven cars can be displayed at a time.
Racer Challenges
In need of some Bank or REP? Racer Challenges have you covered. There are two types of challenges: Day and Night. Each challenge has three tasks (such as “Jump 25m” or “Escape a cop chase at night’); you earn some Bank and REP for completing a single task but completing all three awards the most Bank for your buck.
EVENTS
Note: Some cars are better suited for different Events, so check your car’s Handling Profile before starting. Ideally, you should have a few cars specifically built for each Event type. Hold the L1 button to switch out your car before starting an Event.
Alt. Text: This picture shows all the aspects that show on the game screen during events.
Performance Rating
Every car has a Performance ranging from 100 to 400+. Some races require a minimum Performance Rating to enter, others just have a recommended Rating. Head to the Garage to upgrade your car’s Engine, Drivetrain, and Chassis to increase its Performance Rating.
Speedhunters Showdown Events
Available during the Day, compete in Speedhunters Showdown Events to win Bank. These sanctioned events have clear roads and defined boundaries, so there’s nothing to distract you from the road ahead.
Night Events
Only available at Night, drive these events to win REP. Remember, these are not sanctioned events, so you’ll need to dodge traffic, avoid road hazards, and escape the cops to come out on top.
High Heat Events
Only available at certain REP and HEAT levels, High HEAT Events are amplified, high-stress events. Your AI competitors have better cars, and the cops will interfere with the race. The risk is high, but the reward is greater!
Event Type
Sprint Race
Compete against other racers along a single stretch of road. Whoever gets to the end first, wins.
Circuit Race
Reach the finish line first in a lap-based race.
Off Road Race
You won’t see much asphalt in these races as you master curves, jumps, and obstacles.
Trials
Drift Trial
Perform drifts along a designated route to earn the highest possible score.
Time Trial
Hone your skills and earn the fastest possible time on a fixed route.
Other
Cop Chase
Outmaneuver or take down the cos before you end up Busted or Wrecked!
Activities
Complete Activities on the roads of Palm City for bonus rewards. There are three types of Activities: Drift Zones, Speed Traps, and Long Jumps.
MAP
Map Screen
Alt. Text: This picture shows the map of the city and points icons you will see like locations, route, garage, events, activities, etc.
Map Icons
Highlight an icon to view its description. Once you’ve decided where to go, press the Cross button to set a route to that point. Fast travel to a Garage by highlighting it and pressing the Triangle button.
Press the L1/R1 buttons to filter through the map icons, divided into All, Events, Activities, Locations, and Collectibles.
Mini-Map
The HUD includes a GPS-rendered Mini-Map on the lower left corner of the screen. The Mini-Map shows nearby rivals, current routes, cops, Activities, and Collectibles.
Fast Travel
If you don’t want to drive all the way across town, you can Fast Travel to any previously visited Garage on your Map, or Fast Travel to the main Garage through the Main Menu.
Gas Stations
If you need to repair your car on the road (or while being pursued), pass through a Gas Station to instantly refill your health. Remember: you’re limited to three total Gas Station health refills per night.
Dealerships
Looking for a new ride? Head to a Dealership to purchase new vehicles with your Bank. To unlock cars for purchase, you must complete story missions or earn the proper REP level.
COPS
The Palm City Task Force has increased police presence on the streets. Cops n the Day only go after you if you hit them, but cops at Night are on the lookout for cars to target and bribes to collect. Use your Map ad Mini-Map to keep an eye on nearby cops—and if they turn their sights on you, get ready for a chase.
There are five types of Cop vehicles: Patroller, Normal, Elite, Rhino, and Helicopter. As your HEAT increases, more powerful vehicles appear to try to stop you.
Patroller
Less equipped patrol units.
Normal
Standard cop vehicles.
Elite
Faster, tougher adversaries that appear at higher HEAT levels.
Rhino
Powerful vehicles that inflict heavy damage. They will attempt to stop you in your tracks with head-on collisions.
Helicopter
While under a helicopter’s light, you remain in sight, making escape difficult. Helicopters have limited fuel and will eventually return to base.
Roaming Cops
Day and Night, you can find Palm City police officers patrolling the streets. They’ll ignore you in the Day (unless you give them a reason to chase you), but if you have any HEAT at Night, they’ll immediately start a chase. Their vehicles are marked on your Map and Mini-Map with red icons; keep an eye on them to avoid any trouble.
Cop Chase
When the cops start a pursuit, they will try to slam you into walls, force you off the road, or pin you to prevent you from moving. If you damage or destroy a cop car during a chase, you accumulate more HEAT—and you earn extra HEAT for completely wrecking a cop car. To escape, you must dodge and maneuver your way out of sight or take out those cops you can’t outrun.
Kill- Switch
Normal and Elite cop cars can kill-switch your vehicle by hacking it, damaging your car and impairing your vision and handling. To avoid these attacks, drive out of its range, or disrupt the car by damaging it.
Busted
If the cops box you in, or your car is Wrecked during a pursuit, you’re Busted. They’ll take some of your Bank, reset your HEAT and HEAT Multiplier, send you to the Garage, and end the Night.
Bribe
While being pursued, you have a brief window of opportunity to offer a Bribe to let you go. You lose some of your Bank but maintain your HEAT multiplier. Bribes aren’t available if your HEAT is too high.
CREWS
Though you race alone, your Crew has your back. Team up with other players, compete in Crew Trials, earn extra Bank and REP, and see their cars in your Garage.
Access your Crew and all options described below through the Social/Crews section of the Main Menu.
Starter Crews and Rewards
Since you earn bonus Bank and REP just by being part of a Crew, you never want to go solo. To help you start out, new players are automatically grouped in auto-generated Starter Crews, where they can meet new players and help each other progress.
When a Crew member earns REP, they earn REP for the entire crew to help it level up. As the Crew’s REP Level grows, they unlock new bonuses and rewards for all its members, including an exclusive vehicle for Crews that reach the maximum REP level.
Check out your active Crew rewards, as well as future rewards, in the Crew Rewards screen in the Main Menu.
Crew Leadership and Roles
Once a Starter Crew reaches REP Level 10, players who have earned a certain amount of REP for their Crew can make a claim for Crew Leader. If all conditions are met, the first player to select Claim Leadership in the My Crew page becomes the new leader, elevating their Starter Crew to a genuine Crew. Crews can only have one leader, so it’s first come, first served!
There are other roles besides Crew Leader, each with their own actions they can perform. By default, all players start out as Members.
Alt. Text: This picture shows a chart of each action and role performed in a Crew and who has the responsibility. These roles are listed below:
Leader (Max 1)
A Leader can transfer leadership, edit crew details, remove a member, promote/demote, accept/ reject Crew application, invite players to Crew, contribute to Crew REP level, and earn Crew rewards.
Admin (Max 5)
An Admin can, remove a member, promote/demote, accept/ reject Crew application, invite players to Crew, contribute to Crew REP level, and earn Crew rewards.
Recruiter
A Recruiter can invite players to Crew, contribute to Crew REP level, and earn Crew rewards.
Member
A Member can contribute to Crew REP level and earn Crew rewards.
CREATE OR JOIN A CREW
You don’t have to stay in your Starter Crew. If you’d prefer, you can join a friend’s Crew, accept a player’s invitation, or create your own!
To create a Crew, first quit out of your Starter or existing Crew by going to the Members section and selecting Leave Crew. Next, tab to the Create Crew screen, fill in the requested information to personalize your Crew, and boom: your Crew is ready to conquer Palm City!
Once you have a Crew, you can grow your ranks by inviting players through the Members screen. You can also directly invite any players you meet in game by opening the Party/Players list from the Main Menu, then pressing the R3 button.
If you don’t want to create your own Crew, you can join an existing Crew by receiving a Crew invite (which can be found in the Invites menu) or look for and request membership to a Crew in the Find Crew screen.
CREW TRIALS
As you progress through the game, you unlock Crew Trials. These Crew-limited challenges each come with a Crew Leaderboard to track the best times.
When entered, you’ll race against a pre-recorded ghost car of your opponent. There’s no collision enabled, so you know it’s all about skill.
Battle against your Crew members to try to get the #1 spot in the Crew Leaderboard, but don’t get too comfortable: players are notified when their time is beaten, so they might try to take their crown back!
COLLECTIBLES AND ACTIVITIES
The world of Need for Speed Heat is loaded with bonus gameplay. Whether it’s Collectibles to find or Activities to beat, you’ll need skill, determination, and, of course, a Garage full of cars to come out on top.
The map of Palm City is divided into 18 Districts. You earn rewards for find every item or beating every challenge in each District. Complete each Collectible or Activity type across all 18 Districts to earn even bigger prizes. If you want to own it all, you better start exploring!
Collections
Billboards
Don’t let Palm City PD intimidate you with their billboard campaign—respond with your own message by smashing all their signs. Find a high-speed approach, line yourself up, and hit it as fast as you can. Destroy all the billboards to unlock a unique Nissan GT-R Nismo.
Street Art
Graffiti artists are active on the streets of Palm City, tagging landmarks and buildings with striking art, stencils, and stickers. Collect the ones you like, then send them to your wrap editor to customize your car. Find every artwork to unlock a Nissan 370z Nismo.
Flamingos
Reward your inner avian vandal by finding and smashing the dozens of neon flamingos hidden throughout Palm city. Shatter each bird to win a special edition Porche Cayman GT4.
Activities
Speed Traps
In an attempt to stamp out reckless driving, Palm City PD have installed Speed Cameras throughout each district. Show your appreciation for their initiative by driving past al the cameras at max speed. Get three stars on every device to unlock a unique McLaren 600 LT.
Drift Zones
Palm City’s racers have set record drift scores throughout the region. Find each zone and beat their scores to win a BMW M4 GTS (F82).
Long Jumps
Combine epic run-ups, perfect alignment, and insane performance to beat all the jump-distance challenges and become the owner of a Lamborghini Huracan Performante Spyder.
NEED HELP
The EA Worldwide Customer Experience team is here to ensure you get the most out of your game—anytime, anywhere.
Online Support & Contract Info
For FAQs, help articles, and to contact us, please visit, help.ea.com.
Twitter & Facebook Support
Need a quick tip? Reach out on Twitter to @EAHelp or post on facebook.com/EAHelpHub/.