Official Fe Crystal Guide - Swamp
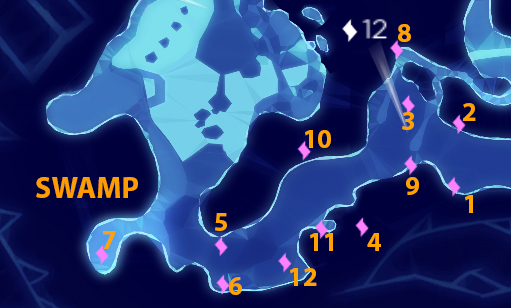
Need some help unlocking every skill? Use this guide to find all of the crystals in the Swamp
1. To the south of the swamp path, you'll see a waterfall. Behind it is a crystal you can reach by going through a cave to the left or taking your chances with the hungry fishes and swimming straight through the waterfall.
2. Directly north of crystal 1, you'll find a pile of rocks marked on the front by a hieroglyph. There's a gap in the rocks with a fish skeleton in front of it – go inside and this crystal will be waiting in the back.
3. Once you enter the area from the east and pass through the swamp, you'll hit dry land and find a raised land bridge ahead of you. Jump down over the west side of the bridge and you'll find a hollow log down below. And what do you know – there's a crystal inside!
4. As you head west through this area, you'll pass through a part of the swamp full of spring flowers that let you hop from one to the other while barely touching the ground. At the end of this marsh, you'll pass under a rocky archway and find a Silent One's body on the other side. Immediately turn left and walk into a gap to the left of a second dead Silent One. Inside, you'll find a spring flower sitting in front of a Silent One cage, and a bomb plant. Activate the spring flower, then grab a bomb seed and throw it into the spring flower. It will bounce out and smash into the cage, breaking it.
On the other side, you'll find an eye-flower, an antlered snake, and a crystal hanging in the air overhead. Sing to the snake so it offers to give you a ride, then activate the eye-flower to create a set of platforms above. Quickly jump on the snake's back and direct it toward the ledge behind the eye-flower, and it will spring up right in front of the platform flowers. Bounce from one to the other as fast as you can, then glide from the last one to your prize.

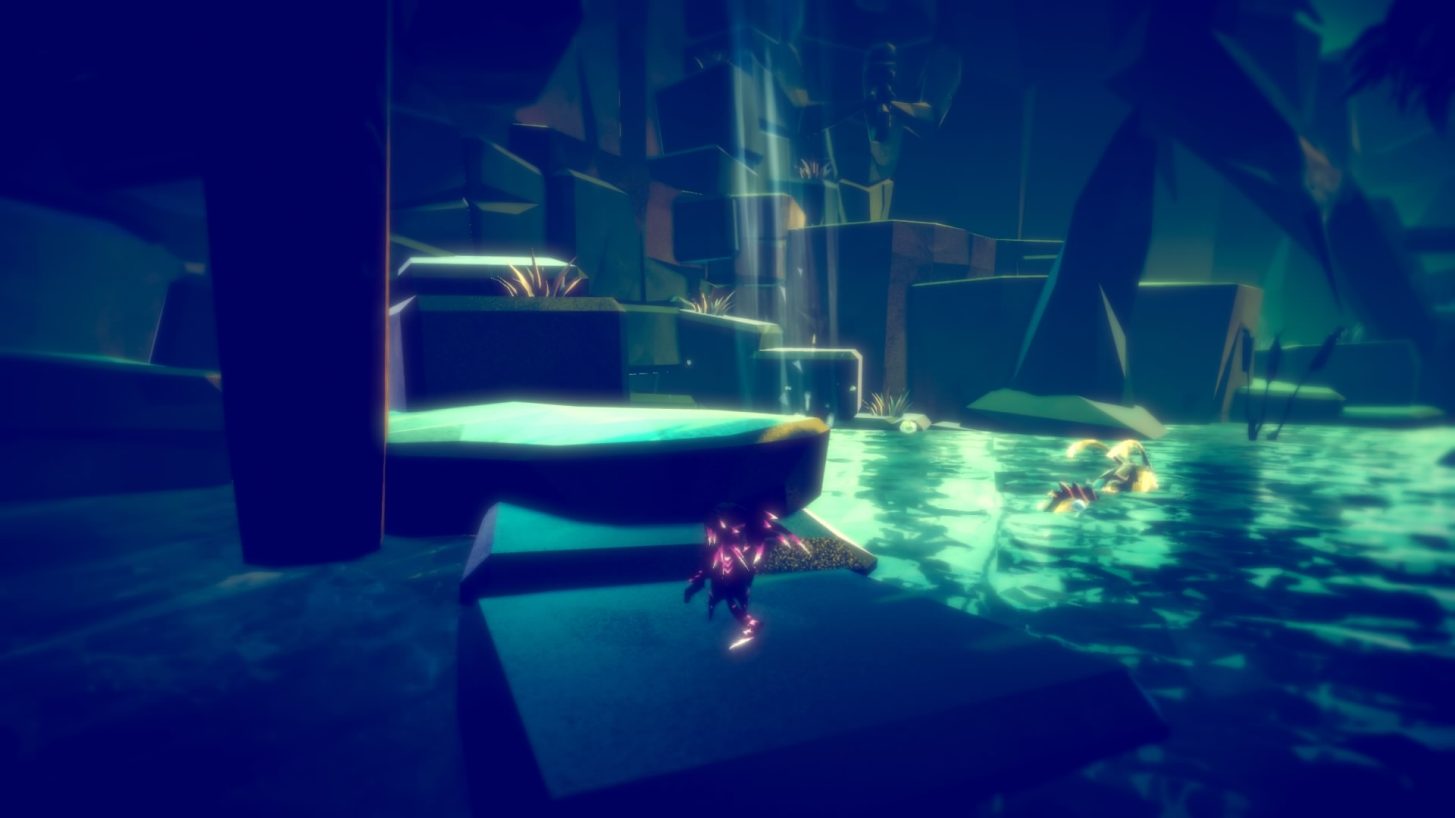
5. Stand on the Silent One shrine on the western edge of the swamp and look directly east. You should see a small gap between the water and a rock overhang, covered by a Silent One cage, with a rock path leading up to it. There's a nest to the west of you with a bomb plant in it. Grab a seed, then carefully walk to the end of the rock path and throw it (don't fall or step into the water, or you'll drop the seed). Once the cage is gone, the crystal inside is yours for the taking.
6. In the southwest corner of the swamp, you'll find a dead Silent One and one of the collectible Silent One helmets. From this spot, go directly north to the edge of the platform and look down. You'll spot a tiny sliver of ground below, and dropping down reveals a cave with a crystal in a Silent One cage. Grab a bomb seed from a plant a few yards to the east (in one of the nests above the water), then come back and break the cage to grab the crystal.
7. Prepare yourself for an adventure, because this one takes some navigating. As you descend into the valley, you'll see an owl on top of a tree slightly east of the main path. Jump on the owl and ride it up to the top of a nearby arch, then head west toward the stairs covered in spring flowers. Turn left at the top of the steps and follow the path until you come to a secluded alcove with an eye-flower in front of you, and one on a higher platform.
This is a timed puzzle, and the flower platforms from both eye-flowers must be active at the same time for you to complete it. (If you're stumped, try this: activate the first flower, jump up to and activate the second, then immediately jump down and activate the first again before the second is finished growing its platforms). Best the challenge, and you'll be rewarded with a crystal at the top of the flower tower.
8. From the mama bird's tree, follow the river west until it reaches a waterfall. Overhead you'll see a large stone platform; climb up to it using the stone path against the cliff to the south. There will be a curved stone directly ahead of you at the top. Run around to the back and climb on top of it, then jump across the small gap to another flat stone ahead of you (to the northeast).
You'll now see two translucent floating jellyfish. Sing to them to make them take shape, then use their springy forms to jump across the chasm to a rock bridge. To the west you'll see a crystal on a higher platform under a broken archway. Use the spring flower below to reach it.
9. Once you've jettisoned off the jellyfish to the land bridge that leads you to crystal 8, take a minute to get your bearings: you'll see that there are two other land bridges connected to the one you're on, both running southwest. Travel down the eastern bridge (it's the one with two spring flowers at the start, instead of just one) until you reach a small forested area.
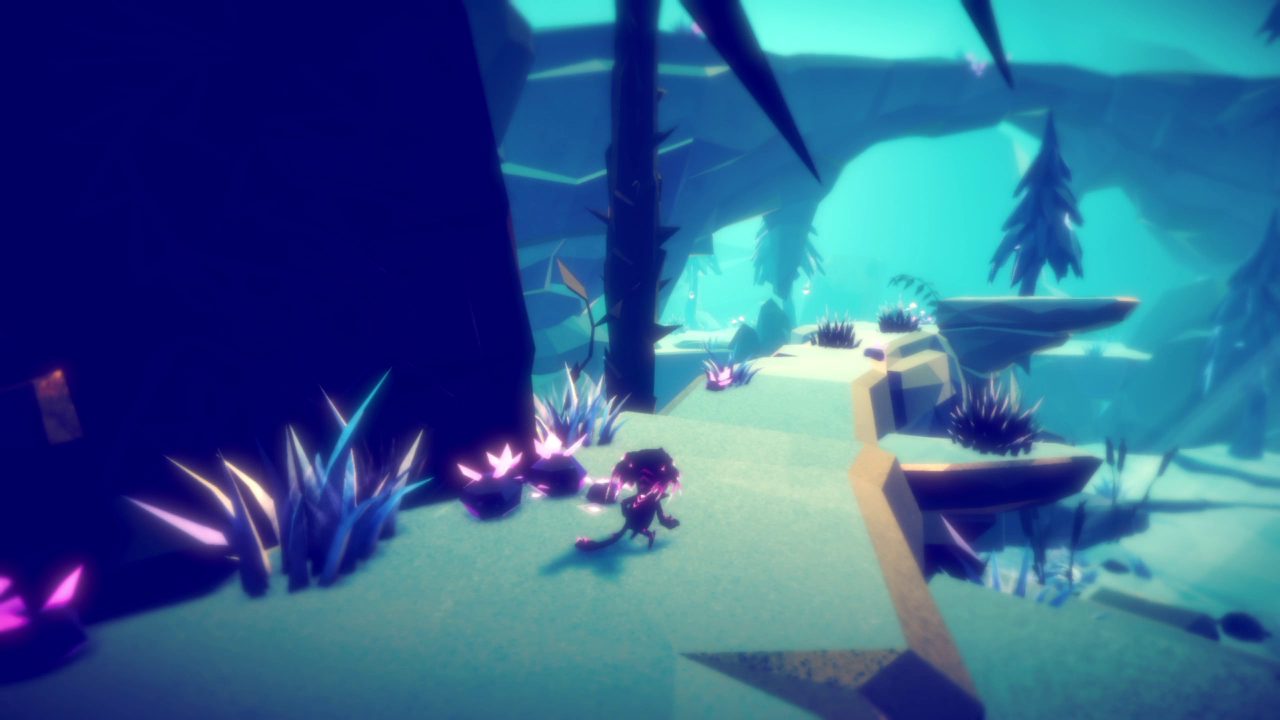
Before you move on, look at the dark black rocks up against the cliff. One looks more cylindrical and a bit shinier than the others – jump on the rocks behind it and you'll see the first isn't a rock at all, but a hollow tree stump. One with a crystal hiding inside.
10. From the spot where you found crystal 9, keep heading southwest until you reach a statue of a Silent One holding a lizard. Use the spring flower right behind it to jump across the gap to a wide ledge, then two more to reach a higher platform.
(From here you can also reach crystals 11 and 12, but 10 takes you down a different path, so you'll need to come here twice to get them all.)
Head to the eastern end of the platform and look over the edge. Below you'll spot another platform. Carefully drop down to it and look north to spot a small gap in the rock. Your next crystal waits inside.
11. Follow the instructions for crystal 10 until you reach the higher platform, but instead of dropping off the edge, turn around. There's a tree growing out of the tall rock beside you within easy jumping distance. Jump from it to the tree next to it, which is slightly higher up, and look southwest. Directly ahead of you, you'll spot a crystal sitting on a ledge under a leaning pillar. Fly or glide toward it, and it shall be yours.
(If you also need crystal 12, don't move! You can reach it from where you are now, so don't drop down or you'll have to make the trek all over again.)
12. From the spot where you grabbed crystal 11, carefully jump up on the wall of blocks next to you and look southwest. The crystal is perched in one of the highest nests in the swamp. Glide toward it, or play it safe and round the cliffside so you land on a ledge to the southeast of the nest. There are two spring flowers here, ready to rocket you up to the nest and your hard-won reward.