
Wrap Editor Tips & Tricks
Hey everyone, my name is Khyzyl and I’m a Concept Artist currently working on Need for Speed. I’ve always loved putting my own designs on cars, so you can imagine how many hours I’ve spent with Need for Speed’s Wrap Editor! It quite literally gives you the ability to replicate designs that exist in real life, or come up with your own unique concepts to really make each car your own.
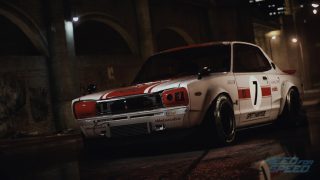
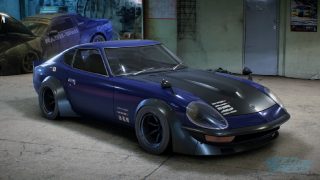
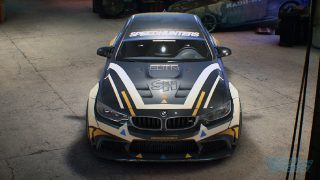
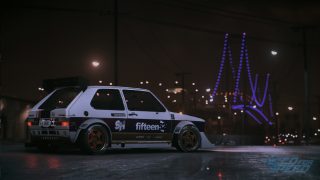
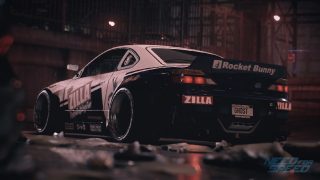
When I create a wrap, I start off by thinking about the look I want to go for. I take a lot of my inspiration for designs from things I’ve seen in car culture - drift builds, street / urban rides or even fully-fledged race cars. If I see something I like in real-life I’ll start thinking about how to achieve similar results within the editor, putting my own twist on it at the same time.
Once I have an idea of what I wish to create, whether this be a replica or my own design, I’ll decide how I’m going to layer the designs, always working from the background all the way to the top.
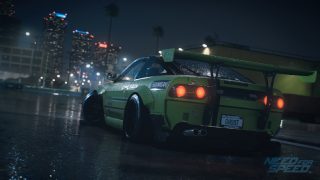
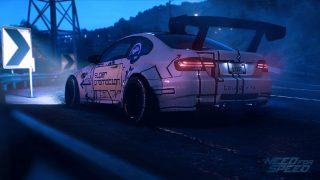
I tend to start with simple shapes first, choosing the base colours as I go. I’ll then try to match different shapes together with the goal of getting them to flow with the shape of the car. Having the ability to move, rotate & scale shapes is incredibly fun as it allows you to create some really cool and unique designs!
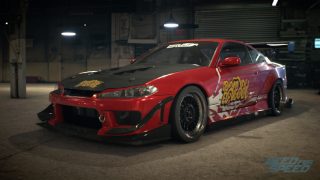
Once I’m happy with the base, I’ll add on the decals & logos I see fit. Sometimes I’ll discover something which seemed like a good idea in my mind doesn’t quite work when it’s added to the car. When that happens, I can easily go back into the layer panel and remove it or even swap it out for something different. It’s all about experimentation!

You’re not limited to just shapes, you have decals and logos from many real world manufacturers at your disposal, not to mention patterns numbers, flags and characters. All of this gives you the ability to create a vehicle that is truly your own design. You could even plan a livery for your own vehicle & see what it looks like in-game before bringing it to life in the real world!
Overall, I think the Wrap Editor adds a whole other dimension to this NFS game, and it’s where I’ve spent most of my time in-game so far. I think you’re all going have an absolute blast with this and I can’t wait to see what you all come up with!
Top Wrap Editor Tips
- Start Off with basic shapes - I find it a lot easier to start off with a basic shape and build from there, rather than going straight in and covering the car with something complex.
- Plan Ahead – Take a look at the car & the way the body shape flows, then try to visualise what type of design you’re going for first as it’ll make it easier to plan what shapes to use to achieve the effect you desire.
- Seek Inspiration – There’s no harm in taking inspiration from real cars or other resources, this helps increase your visual library and enables you to come up with new ideas!
- Experiment with Shadows & Lighting – Try experimenting with the shadow of a shape and see what effect it gives you. You can turn a 2D object into something that looks three dimensional just by adding a simple silhouette behind it.
- Work panel by panel – I find it easier to concentrate on one panel at a time. This way, you don’t get overwhelmed by what you’re trying to create and get a greater idea of what you need to do to ensure everything matches up.
- Simple stuff always comes first – Start with something simple at first. Try laying a generic pattern over the car to get all the sides matched up first. It’s a good way for you to get familiar with how to use the wrap editor and its tools.
- Get to grips with the tool itself – Before you try anything, just have a play around with the controls and see what does what. Try adding a decal, then replacing it with something else. Get used to how the editor works and this will help you greatly when it comes to creating that perfect design.
- Have fun – Don’t worry if you don’t get something appealing to start with, just keep at it and most importantly, have fun!
Become part of the conversation on all things Need for Speed by liking us on Facebook, following us on Twitter, listening to our music on Spotify and being the first to watch our new videos by subscribing on YouTube. To get started in Need for Speed visit the buy page. Play Need for Speed No Limits on Mobile.
